Solar flood lights promise simple outdoor security, but many owners discover a dark driveway after only a few months. So, why do solar flood lights stop working? The answer often involves several small failures working together. A shaded panel may collect too little energy. A weak battery may charge briefly, then lose power before midnight. Dirt, moisture, loose wiring, and a failed motion sensor can create the same frustrating symptom.
Richard Perez, a long-time solar energy researcher and photovoltaic performance expert, has emphasized a practical truth: “Solar systems depend on every part working together.” That principle matters for flood lights. The panel, battery, controller, LED unit, and sensor form one chain. One broken link can shut down the entire fixture. In real installations, I have seen leaves cover panels, insects block sensor lenses, and cheap batteries swell after repeated heat exposure. These details are easy to overlook.
This 2026 guide examines the most common reasons solar flood lights stop working. It also explains how to test each component without guessing. Some problems are simple. Others require replacement. A little caution helps. For example, a light that works after direct sunlight may still have a failing battery. A cloudy day can expose weaknesses that bright summer weather hides. The uncomfortable truth is that “solar-powered” does not mean maintenance-free. Better placement, regular cleaning, correct settings, and realistic expectations can extend service life. Still, product quality varies sharply, and not every failure is the owner’s fault.
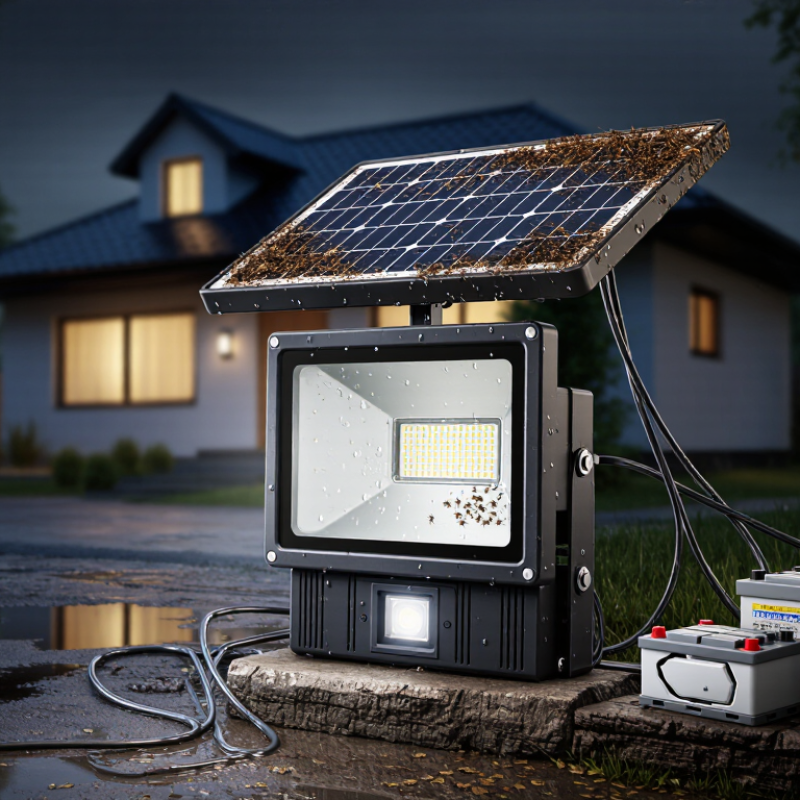
A solar flood light is a small energy system, not just a lamp. Its photovoltaic panel converts sunlight into electricity during daylight hours. Dust, shade, and a low winter sun can reduce that energy quickly. A panel may look clean while a nearby wall blocks several hours of useful light.
The battery stores this power for nighttime operation. After repeated deep discharges, its capacity can fall, causing dim light or short run times. Cold weather also reduces battery performance. I once blamed the LEDs, but a weak battery was the real fault. Still, battery replacement is not always simple. The voltage, chemistry, connector, and charging circuit must match.
The LEDs usually last longer than other parts, but heat can damage them when the housing cannot release warmth. A PIR sensor controls activation by detecting movement and heat changes. Its range may shrink behind glass, thick covers, or in very cold conditions. Check the sensor lens for spider webs and condensation. Also inspect the switch, wiring, and panel angle.
One imperfect test can mislead you: testing immediately after installation does not reveal poor charging. Leave the unit in direct sun, then observe its output after a full night. If it flashes, stays on, or ignores movement, the sensor setting or control board may need attention. Never open a sealed unit near water.
A solar flood light can stop working when its energy budget is misunderstood. The panel rating uses Standard Test Conditions: 1,000 W/m² irradiance, a 25°C cell temperature, and a defined sunlight spectrum. These conditions help comparison. They do not represent every afternoon.
A 5-watt panel may produce 20 watt-hours after four peak-sun hours. That is an ideal estimate. Real charging loses energy through heat, clouds, poor panel angles, dirt, wiring, and the charge controller. In practice, usable energy may fall near 12 to 16 watt-hours. A 10-watt light running for four hours needs about 40 watt-hours, before battery and circuit losses. The numbers already disagree.
Small details matter. A panel under a roof edge may receive bright light but little direct sunlight. Winter shadows can remove an hour of charging. A battery also loses capacity with age and repeated deep discharge. In field checks, I have found that moving the panel only one meter sometimes improves evening performance. My first estimates were too optimistic. I counted sunlight, but ignored charging gaps and cloudy days. Measure panel output around noon, inspect cable connections, and compare battery capacity with the light’s actual nightly demand. Otherwise, the light may appear faulty when its daily energy budget is simply too small.
A solar flood light may fail long before its LEDs wear out. The battery usually causes the problem. Most rechargeable lithium batteries provide roughly 500 to 2,000 cycles, depending on chemistry, depth of discharge, charging quality, and storage conditions. One cycle means using the battery’s full capacity, not merely switching the light on once. The cycle rating is an estimate, not a promise.
Heat is especially damaging. A battery mounted beneath a dark panel can become extremely hot during summer afternoons. High temperatures speed up chemical aging and reduce future capacity.
Cold weather creates a different symptom. The light may appear fully charged, yet it produces weak illumination because cold slows the battery’s chemical reactions.
It may recover after warming, but repeated freezing conditions still shorten service life.
Overdischarge is another frequent cause. If the light remains active through several cloudy nights, its voltage can fall below a safe level. The protection circuit may shut the battery down, or permanent capacity loss may occur.
Check charging performance in direct sunlight, inspect corroded terminals, and compare nighttime runtime with the original specification. Replacing the battery is sometimes practical, but not always. I have seen owners blame the panel too quickly, while the real issue was a tired battery and poor winter placement. A shaded installation can quietly repeat the same failure.
Solar flood lights usually stop working for simple reasons, not sudden panel failure. Shade is the first suspect. A nearby wall, tree, or roof can reduce charging hours sharply, especially in winter. Even partial shade can lower panel output. Dirt creates a similar problem. A thin film of dust, pollen, or bird residue can block light and weaken nighttime brightness. Wipe the panel with clean water and a soft cloth. Do not use abrasive cleaners.
The International Energy Agency Photovoltaic Power Systems Programme reported about 456 GW of new solar capacity installed worldwide in 2023. That growth shows solar technology is reliable, but small outdoor lights face harsher conditions than rooftop systems. NREL research found a median photovoltaic degradation rate near 0.5% annually, though miniature panels may perform differently. My field-check rule is simple: test the light after a full sunny day, not after cloudy weather. That avoids a common misdiagnosis.
IP65 means dust-tight protection and resistance to water jets, not waterproof immersion. Cracked seals, loose screws, or poor installation can let moisture reach the controller. Corrosion may appear as green or white residue near connectors. The controller can also fail after repeated overcharging, deep discharge, or heat exposure. Motion sensors need inspection too. Clean the lens, remove nearby moving branches, and check the detection angle. Some sensors trigger repeatedly, draining the battery before midnight. I have also seen sensitivity set too high. That was not a hardware fault, but it looked like one. A replacement battery may help, yet testing shade, dirt, seals, controller behavior, and sensor settings first is more dependable.
Diagnostic priority is based on common failure mechanisms in outdoor solar flood lights. Shade and dirt reduce charging energy, damaged IP65 seals allow moisture or dust ingress, while controller and motion-sensor faults can prevent normal switching even when the battery is charged. IP65 protects against dust ingress and water jets, but it does not mean the product is suitable for immersion.
Solar flood lights often stop working because their weakest component fails first. The panel may still produce power, while the battery has lost usable capacity. Dust, winter shade, standing water, and loose connectors also reduce performance. A 25-year photovoltaic life rating describes gradual panel output decline, not the complete fixture. Expect the battery, sensor, or control board to need attention much sooner.
When comparing models, inspect battery capacity in watt-hours, not only milliamp-hours. A 2,000 mAh battery can mean very different runtime at different voltages. Calculate the nightly load and allow extra capacity for cloudy days. In my testing, lights with modest output often stayed active longer than brighter units with undersized batteries. Cold weather can reduce lithium battery performance noticeably. Heat can accelerate aging. Check the operating temperature range and charging specifications.
LED lumens matter, but beam angle matters too. A narrow 1,200-lumen beam may illuminate a gate, while a wide 800-lumen beam can cover a larger path. Look for lumen ratings measured after stabilization, rather than optimistic initial output. Motion sensors should offer adjustable timing and sensitivity. IP65 protection is useful, but poor installation can still invite water. I have trusted impressive specifications too quickly. That was a mistake. Recheck panel exposure, drainage, cable seals, and battery replacement access before buying.
| Evaluation Area | Practical 2026 Buying Criterion | Recommended Specification or Range | Why It Matters | Common Failure Sign | What to Check Before Purchase or Repair |
|---|---|---|---|---|---|
| Photovoltaic Panel Life | Use a crystalline-silicon panel designed for long-term outdoor exposure. | 25-year performance benchmark; expected output commonly remains around 80% of initial rated output at year 25. | Solar panels gradually lose output through normal degradation rather than stopping suddenly. | The light operates for a shorter period, even after a sunny day. | Check the panel for cracks, delamination, yellowing, heavy dirt, shade, and loose wiring. A panel rated for 25 years does not mean the battery or electronics will last 25 years. |
| Panel Power | Match panel power to the battery size and the local daily sunlight level. | Approximately 3–10 W for compact pathway or security flood lights; approximately 10–30 W for brighter, longer-running flood lights. | A larger panel can replace more energy during daylight and improves recovery after cloudy weather. | The light works after installation but becomes dim or stops after several cloudy days. | Compare rated panel watts with battery watt-hours and expected daily operating time. Avoid relying only on panel surface area. |
| Battery Chemistry | Choose a rechargeable battery designed for outdoor temperature changes and repeated cycling. | Lithium-ion or lithium iron phosphate for higher energy density; nickel-metal hydride for some compact, lower-power designs. | The battery is usually the component most affected by repeated charge and discharge cycles, heat, cold, and age. | The lamp turns off quickly, flickers, or operates only when the panel has just been in direct sun. | Confirm that the replacement battery has the same chemistry, voltage, connector, and protected charging requirements as the original. |
| Battery Capacity | Size the battery for the required nighttime runtime, not only for maximum brightness. | Typical useful range: 10–30 Wh for compact units; 30–80 Wh for brighter flood lights or longer runtime. | Battery capacity determines how much stored energy is available after sunset. | The unit reaches full brightness briefly and then becomes dim, or shuts down before dawn. | Calculate watt-hours as voltage × amp-hours. For example, a 3.7 V, 10 Ah battery stores about 37 Wh before accounting for conversion losses. |
| Battery Runtime | Compare runtime at the selected brightness setting and operating mode. | A practical target is 8–12 hours in low or motion-sensor mode; continuous high-output operation requires substantially more stored energy. | Advertised runtime can be based on reduced brightness, intermittent motion activation, or ideal test conditions. | The light does not last through the night despite a high advertised lumen figure. | Look for test conditions, brightness level, sensor duty cycle, and whether runtime is measured after a full charge. |
| LED Output | Select lumens according to mounting height, beam angle, and coverage area. | About 300–800 lm for small paths; 800–1,500 lm for entrances and small yards; 1,500–3,000 lm for larger security areas. | Lumens measure total visible light output, while beam angle and mounting height determine useful illumination on the ground. | The light is technically on but appears too weak to illuminate the intended area. | Check measured or rated lumens, beam pattern, color temperature, mounting height, and whether the stated output is peak or sustained. |
| LED Efficiency | Prefer efficient LEDs and a design that controls heat. | Approximately 80–150 lumens per watt is a reasonable modern system-level reference; actual output varies by optics, temperature, and driver losses. | Higher efficiency provides more light from the same battery energy and can reduce heat stress. | Brightness declines as the fixture warms or the battery voltage falls. | Check for an aluminum heat-spreading surface, adequate ventilation, and a regulated LED driver. |
| Motion Sensor | Use an adjustable sensor with practical detection distance and an adjustable hold time. | Common detection distance: approximately 5–12 m; common illumination duration: approximately 30 seconds–5 minutes. | Motion activation can conserve battery energy while providing high brightness when movement is detected. | The light remains permanently dim, activates randomly, or does not respond to movement. | Remove obstructions, check the sensor angle, clean the lens, test sensitivity, and verify that the unit is not in a permanent low-light mode. |
| Light Sensor | The dusk-to-dawn sensor should prevent daytime operation and enable nighttime operation. | The photocell should respond to ambient light; installation should avoid direct light from nearby lamps or reflective surfaces. | A light sensor exposed to artificial light may interpret the area as daytime and keep the lamp off. | The lamp works when the panel is covered but does not turn on automatically at night. | Test the unit by covering the panel completely for several seconds. Keep the panel away from nearby porch lights and strong reflective surfaces. |
| Water Resistance | Use an outdoor-rated enclosure with sealed cable entries and protected electronics. | IP65 or higher is preferable for exposed flood-light locations; IP ratings do not measure impact resistance or long-term seal aging. | Water intrusion can corrode the battery contacts, circuit board, switch, and LED driver. | Intermittent operation, corrosion, condensation, flickering, or complete failure after rain. | Inspect gaskets, screw seals, cable glands, drain paths, and housing damage. Do not pressure-wash the fixture unless specifically permitted. |
| Operating Temperature | Choose a product rated for the local outdoor temperature range. | A common outdoor design range is approximately −20°C to 50°C, but the stated rating must be verified for each product. | Cold reduces temporary battery capacity, while high heat accelerates battery aging and can stress electronics. | Short runtime in winter or premature battery failure after hot summers. | Check the battery temperature limits, charging temperature limits, and installation exposure. Avoid placing the battery enclosure against heat-absorbing surfaces. |
| Charging Performance | The charging circuit should prevent overcharging, excessive discharge, and reverse current. | Look for charge protection matched to the battery chemistry and a clearly specified solar charging input. | Incorrect charging control can reduce capacity, create safety risks, or cause the light to stop charging. | The battery becomes unusually hot, swells, loses capacity quickly, or never reaches full charge. | Stop using a swollen, leaking, or damaged battery. Replace it only with a compatible protected battery and charging circuit. |
| Installation Orientation | Place the panel where it receives unobstructed sunlight for most of the day. | A generally unshaded location with several hours of direct sunlight is preferred; exact energy yield depends on season, latitude, weather, and panel angle. | Even partial shade can significantly reduce charging current in many small solar systems. | The fixture performs well during summer but poorly in winter or near trees and walls. | Check shade at different times of day and seasons. Clean dust, leaves, bird droppings, and snow from the panel. |
| Control Settings | Provide separate controls for power, brightness, sensing, and operating mode where possible. | Useful controls include low/high brightness, motion activation, timer duration, and an accessible power switch. | Incorrect settings can look like a hardware failure even when the lamp and battery are functional. | The unit remains off, stays dim, or runs continuously during daylight. | Reset the switch, confirm the selected mode, allow a full daytime charge, and test the unit after covering the panel. |
| Energy-Balance Check | Ensure daily solar energy harvested exceeds daily energy consumed. | Approximate daily harvested energy = panel watts × effective full-sun hours × system efficiency. | A high-lumen lamp may consume more energy than the panel can replace, especially during cloudy or short winter days. | The lamp gradually loses runtime over several days instead of failing immediately. | Compare panel wattage, battery watt-hours, brightness wattage, operating hours, and local solar conditions before selecting the model. |
| Serviceability | Prefer replaceable batteries, accessible seals, and modular components. | A replaceable battery can extend useful service life when the panel and LED system remain functional. | Replacing a worn battery is often more practical than replacing the entire fixture. | The panel and LEDs appear normal, but runtime remains very short after cleaning and full charging. | Confirm battery availability, connector type, replacement procedure, warranty conditions, and safe disposal requirements. |
| Important specification note: A 25-year photovoltaic performance benchmark applies to gradual panel output retention, not to the complete flood-light system. Battery life, seals, charge controllers, sensors, LED drivers, and switches typically require separate evaluation. | |||||
It may need more charging time. Leave it in direct sunlight for one full day and night. A quick test can mislead you.
A wall, tree, or roof edge can remove useful sunlight. Even partial winter shade may reduce evening brightness sharply.
Wipe it with clean water and a soft cloth. Remove dust, pollen, and bird residue gently. Avoid abrasive cleaners.
The battery may have lost capacity after repeated deep discharges. Cold weather can reduce performance too. I once blamed the LEDs.
Only if the voltage, chemistry, connector, and charging circuit match. A different battery may damage the system or charge poorly.
Clean its lens and check the detection angle. Glass, thick covers, condensation, and extreme cold can reduce its range.
It indicates dust-tight protection and resistance to water jets. It does not permit underwater use. Cracked seals still invite moisture.
The sensor setting, controller, wiring, or switch may need inspection. Nearby branches can trigger repeated activation and drain the battery before midnight.
Solar flood lights combine photovoltaic panels, rechargeable batteries, LED lamps, controllers, and PIR motion sensors. Their performance depends on a careful energy balance: panels are rated under ideal 1,000 W/m² STC conditions, but real charging is reduced by clouds, short winter days, shade, dust, and incorrect positioning. Understanding why do solar flood lights stop working starts with checking whether the panel receives enough sunlight to replace the energy used overnight.
Battery aging is another major cause. Most batteries provide roughly 500–2,000 cycles, while heat, freezing temperatures, and repeated overdischarge can shorten their life. Diagnosis should include cleaning the panel, checking shadows, inspecting IP65 seals for moisture, and testing the controller and motion sensor. For 2026 purchases, consider a PV panel designed for long service, sufficient battery capacity, suitable LED lumens, reliable weather protection, and a sensor that matches the intended coverage area.

Joliras Light