Solar flood lights promise simple security lighting, but outdoor conditions quickly test that promise. In 2026, homeowners and facility managers still ask, “what are common problems with solar flood lights?” The answers usually involve weak charging, short operating time, motion sensor errors, water intrusion, dim LEDs, or a battery that no longer holds energy.
Solar lighting engineer Steven J. Strong offers a useful field principle: “A solar lighting system is only as reliable as its weakest component.” That warning matters beside a driveway, warehouse gate, or garden wall. A shaded panel may receive only a narrow strip of sunlight. Dust can form a dull film over the glass. A cold night can reduce battery performance before midnight. Small details become visible problems.
This guide explains how to diagnose and solve these faults without guessing. It connects symptoms with practical checks, such as measuring panel exposure, cleaning the surface, testing sensor distance, and inspecting cable seals. The discussion also considers battery age, seasonal sunlight, installation height, and incorrect operating modes. Some recommendations may seem obvious. They are still often missed.
Real troubleshooting is rarely perfect. A light may appear faulty when the panel is simply installed under a roof edge. A new battery may help, but not if the controller is damaged. We will question easy assumptions and identify when replacement is more sensible than repair. The goal is dependable illumination, not impressive specifications on a product page.
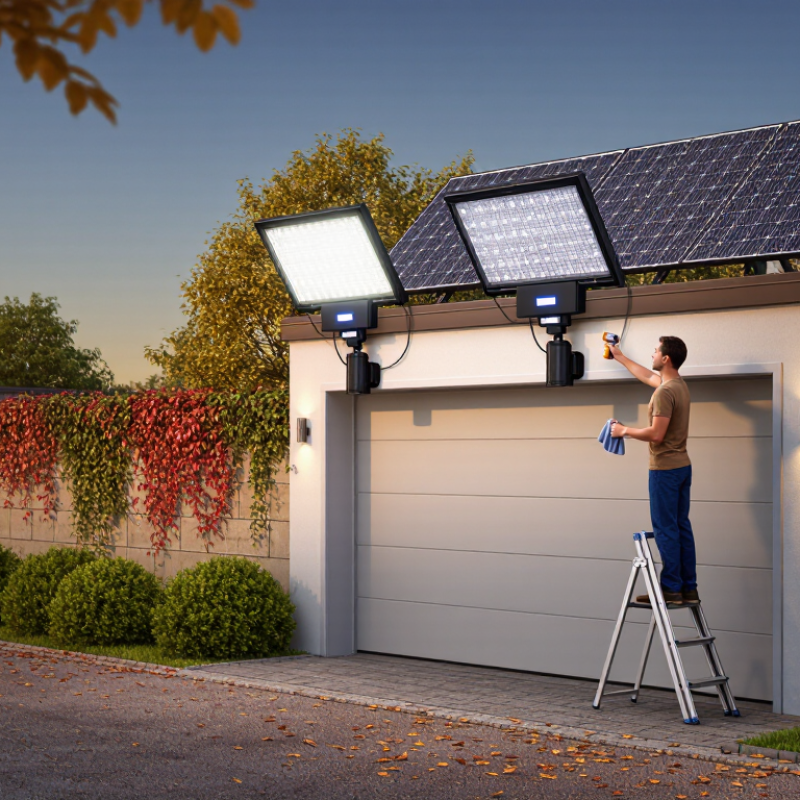
How to Solve Common Solar Flood Light Problems in 2026?
Solar flood lights now operate in harsher outdoor conditions as installations expand. The IEA PVPS Trends in Photovoltaic Applications 2024 report recorded about 456 GW of new solar capacity in 2023. More equipment also means more field failures. Classify the symptom before replacing parts. A light that stays dark usually indicates a depleted battery, failed photocell, loose connector, or shaded panel. Brief flashing often suggests low battery voltage or unstable wiring. Dim output may result from dust, aging LEDs, or insufficient charging time. Check the panel at noon. It should receive direct sunlight.
Water-related symptoms require the IEC 60529 rating. IP65 means dust-tight protection and resistance to water jets. IP66 handles stronger water jets. IP67 permits temporary immersion, but it does not guarantee long-term underwater operation. Water droplets behind the lens, green corrosion, or a tripped protection circuit suggest seal damage. Do not assume a higher number solves every problem. Cable glands, mounting angles, and cracked housings can defeat the rated enclosure. IEA PVPS degradation research commonly uses about 0.5% annual photovoltaic power loss as a planning reference, but real panels can perform worse under heat, dirt, and shading. Field checks are imperfect. Record rainfall, charging hours, battery age, and night temperature before judging the product. Repair decisions should follow the manufacturer’s electrical limits and qualified safety procedures.
Use the visible symptom as the starting point, then check solar exposure, battery condition, wiring, controls, installation, and water or dust protection. IP ratings describe enclosure protection under IEC 60529; they do not measure battery life, charging performance, light output, or long-term weather resistance.
| Observed Symptom | Most Likely Causes | Recommended Diagnostic Checks | Practical Corrective Action | Relevant IP Rating Consideration | Priority | Preventive Measure |
|---|---|---|---|---|---|---|
| Light does not turn on at night | Battery is deeply discharged or defective; solar panel received insufficient daylight; dusk sensor is obstructed; power switch is off; wiring or connector is loose. | Confirm the switch position. Clean the panel. Check whether the installation receives direct sunlight. Test battery voltage according to the product instructions and inspect connectors for corrosion. | Fully charge the unit in clear daylight, remove obstructions, reseat connectors, replace a failed battery with the specified type, and replace damaged wiring or the control module when necessary. | Water ingress may cause sensor, battery, or controller failure. A sealed enclosure rated IP65 or higher helps resist dust and water jets, but cable entries must also be properly sealed. | High | Keep the panel unobstructed and inspect seals, cable glands, and the battery compartment after severe weather. |
| Light turns on during the day | Dusk-to-dawn sensor is covered, dirty, incorrectly positioned, or malfunctioning; nearby artificial light is affecting the sensor; control settings are incorrect. | Remove the protective film or dirt from the sensor. Check for streetlights, wall lights, or reflected light. Test the unit away from strong artificial light and verify operating modes. | Clean or reposition the sensor, eliminate direct artificial light where possible, restore the correct operating mode, or replace the sensor/controller if it remains active in bright conditions. | The sensor opening and its seal must maintain the enclosure rating. A damaged lens, cracked housing, or poorly sealed sensor can reduce the stated IP rating. | Medium | Position the sensor away from artificial light and check the housing for cracks during routine maintenance. |
| Light is dim or runtime is shorter than expected | Battery is aging; panel is dirty or shaded; several cloudy days have reduced charging; low-temperature conditions have reduced battery performance; LED or driver efficiency has declined. | Compare runtime after a full sunny-day charge. Inspect panel orientation, shading, dirt, battery terminals, and programmed brightness or motion-sensor settings. | Clean and reposition the panel, reduce unnecessary brightness or operating hours, allow a full recharge, and replace the battery if capacity has materially declined. | Dust accumulation can reduce charging even when the enclosure remains dust-tight. IP6X means dust-tight protection against solid objects, not protection from reduced solar energy caused by surface dirt. | Medium | Clean the panel periodically, preserve a clear solar path, and use the battery chemistry and temperature range specified for the product. |
| Light flickers or repeatedly resets | Loose connector; unstable battery connection; moisture or corrosion at terminals; failing LED driver; overloaded or damaged control circuit. | Turn off the unit before inspection. Check connectors, terminal tightness, cable insulation, corrosion, and signs of condensation. Observe whether flicker changes when the cable is gently moved. | Dry the enclosure safely, clean minor corrosion where appropriate, replace damaged connectors or cables, and replace the driver or controller if electrical instability continues. | Repeated flicker after rain can indicate compromised sealing. IP66 protects against powerful water jets, but it does not permit damaged seals, open cable glands, or incorrect reassembly. | High | Use weatherproof connectors, avoid cable strain, create a downward cable drip loop, and inspect the enclosure after impact or servicing. |
| Condensation or water droplets appear inside the housing | Damaged gasket; loose cover screws; cracked lens or housing; poorly sealed cable entry; pressure changes causing moisture to be drawn into the enclosure. | Disconnect power if water is near electrical terminals. Inspect the lens, gasket, screws, cable gland, drain or vent features, and internal corrosion. Do not rely only on external appearance. | Dry and test the unit only when safe. Replace damaged seals or housing parts, correctly tighten fasteners, reseal approved cable entries, and replace corroded electrical components. | A claimed IP65, IP66, or IP67 rating applies only when the complete enclosure is correctly assembled and maintained. Condensation may also occur from thermal cycling and is not automatically proof of failed IP testing. | High | Replace compressed or brittle gaskets, avoid opening the unit in rain, and follow the specified torque and sealing procedure. |
| Unit fails after heavy rain or water exposure | Water entered through a damaged seal, lens, switch, connector, or cable gland; the product was exposed beyond its intended installation conditions; impact damaged the enclosure. | Isolate the unit, inspect for water trails and corrosion, identify the entry point, and check whether the product was submerged or subjected to pressure beyond its intended rating. | Do not energize a wet unit. Drying alone may not remove corrosion or insulation damage. Replace affected electrical parts and restore the enclosure using compatible seals and components. | IPX5 protects against water jets; IPX6 protects against powerful water jets; IPX7 covers temporary immersion under specified test conditions. These water ratings are not interchangeable. | High | Install the product within its specified rating, protect cable entries, and never assume a water-jet rating permits permanent or deep immersion. |
| Light fails after flooding or temporary immersion | Water reached the battery, controller, LED driver, or terminals; the unit's immersion rating was exceeded; the enclosure was opened and not resealed correctly. | Disconnect the unit and document the water level and duration. Check the product's complete IP code and inspect all internal compartments for water, corrosion, and contamination. | Replace water-damaged batteries and electronics as required. Replace the complete unit if the enclosure integrity cannot be reliably restored or if internal corrosion is extensive. | IPX7 is for temporary immersion up to the specified test conditions, commonly up to 1 m for 30 minutes. IPX8 is for continuous immersion under conditions agreed between the manufacturer and user; the exact depth and time must be specified. | High | Mount above known flood levels and use a product whose complete IP code matches the actual installation environment. |
| Motion sensor does not trigger the light | Sensor sensitivity or detection range is incorrect; sensor is aimed too high or too low; lens is dirty; battery voltage is too low; ambient temperature or movement is outside the sensor's detection conditions. | Check the operating mode, sensitivity, timer, and detection angle. Walk across the detection zone rather than directly toward the sensor, and clean the sensor lens. | Adjust the mounting angle and settings, clear vegetation or obstructions, clean the lens, and replace the battery or sensor module if testing confirms failure. | A sensor lens must remain intact and sealed. Dust or water on the lens can reduce detection even when the enclosure still meets IP65 or IP66. | Medium | Aim the sensor at the intended approach path, keep the detection zone clear, and inspect the lens after storms. |
| Solar panel is cracked, loose, or visibly damaged | Hail, impact, wind loading, incorrect mounting, thermal stress, or corrosion of mounting hardware. | Check for cracks, delamination, loose brackets, cable damage, and water entry near the panel junction box. Do not touch exposed conductors or damaged wiring. | Isolate the unit and replace the damaged panel or complete assembly. Retighten or replace mounting hardware using the specified installation method. | The module's enclosure rating does not protect a cracked panel or damaged junction box. Confirm the panel and its cable connections have suitable outdoor protection. | High | Use secure mounting, allow for thermal movement, avoid overtightening, and inspect hardware after high winds or hail. |
| Battery becomes swollen, hot, or leaks | Battery overcharging, short circuit, physical damage, age-related failure, unsuitable replacement battery, or exposure to excessive heat. | Stop using the unit and keep it away from ignition sources. Do not puncture, compress, recharge, or open a swollen battery. Arrange handling according to local battery safety and recycling requirements. | Replace the battery with the specified chemistry, voltage, capacity, connector, and protection configuration. Investigate the charging circuit if a replacement battery also overheats. | IP protection does not prevent thermal runaway or battery abuse. The battery compartment must remain dry, correctly sealed, and within the specified temperature range. | High | Use only compatible batteries, prevent direct heat exposure, and replace batteries showing swelling, leakage, odor, or abnormal heating. |
| Dust, insects, or debris are found inside the housing | Damaged gasket or lens; missing fastener; unsealed cable entry; housing was opened and incorrectly reassembled; enclosure rating does not match the environment. | Inspect every joint, screw, gasket, connector, and cable entry. Look for gaps, deformation, and evidence of forced entry or impact. | Replace defective seals and damaged parts, close unused cable openings with suitable sealing components, and replace the enclosure if it cannot be restored. | The first digit indicates protection against solids. IP5X means dust-protected with limited ingress permitted; IP6X means dust-tight under the specified test. | Medium | Select an appropriate solid-particle rating, keep joints clean, and reseal the enclosure after every service operation. |
| Light output is uneven or some LEDs are dark | LED array or driver failure; partial water damage; loose internal connection; thermal stress; optical lens contamination or damage. | Compare the light pattern with the original distribution. Inspect the lens and housing, check for discoloration or corrosion, and test the driver only with suitable electrical equipment. | Clean the external lens, repair or replace the LED module or driver when serviceable, and replace the complete lamp if internal repair would compromise the enclosure. | A higher IP rating does not guarantee LED reliability or optical performance. Water, dust, and chemical exposure can degrade LEDs and lenses even without immediate total failure. | Medium | Keep the lens clean, maintain heat dissipation, avoid harsh chemicals, and promptly address any water or dust ingress. |
| Light works only when the switch or cable is moved | Loose switch contact; broken conductor; poorly crimped terminal; cable fatigue; connector contamination or corrosion. | Isolate the power source, inspect cable strain points and connectors, and perform continuity testing with appropriate equipment. Do not bypass protective components. | Replace damaged cable or connector assemblies, secure the cable against movement, and replace the switch or control board if its contacts are unreliable. | An outdoor IP rating is invalidated if a cable jacket, gland, connector, or switch is damaged. The complete installed system must preserve the intended protection. | High | Provide strain relief, avoid sharp bends, use compatible outdoor connectors, and do not leave unused openings unsealed. |
IEC 60529 reference: In an IP code, the first digit relates to protection against solid foreign objects and dust, while the second digit relates to water protection. IP65, IP66, and IP67 describe different water-test conditions and should not be treated as equivalent. For electrical safety, isolate the unit before opening it and seek qualified service when water damage, battery damage, or exposed wiring is present.
Test the panel under about 1,000 W/m², 25°C, and an AM1.5 spectrum. Record open-circuit voltage and short-circuit current. Compare measured power with the rated value. Outdoor sunlight changes constantly. The test may be imperfect.
Crystalline silicon panels often lose about 0.5% annually. A sudden 30% loss may indicate dirt, cracks, shading, or circuit problems. Clean the glass with water and a soft cloth. Then repeat the test. Small panels can behave differently.
Check the panel connector, blocking diode, charge-controller terminals, and battery voltage under load. Look for corrosion around contacts. It can appear harmless. It is not. Also check nighttime discharge for controller faults.
Soiling can reduce output by roughly 2–7%, especially in dry areas. Dust may form a dull film on the glass. Clean gently, without scratching the surface. Thin haze can also weaken outdoor readings. Full sun is not always reliable.
Mount the light around 2–2.5 metres high. Aim the sensor toward the approach path. Typical detection reaches about 8–12 metres with nearly 120° coverage. These figures are not guaranteed. Walls, temperature, and mounting height change results.
Mark an 8-metre line on the ground. Walk across it slowly, then test at 10 and 12 metres. Adjust the sensor in small movements. Walking across the zone usually triggers more easily than walking directly toward it. My first adjustment was too aggressive.
Test after one full sunny day with a clean panel. Record the start time, brightness, temperature, and shutoff time. Repeat for three nights. One cloudy evening can mislead you. Cold weather reduces battery output.
A useful efficiency range is about 100–150 lm/W. Measure illuminance one metre from the fixture. Compare the result before and after installation. Switch the unit off before removal. Wear stable footwear and support the fixture. Match polarity, keep connectors dry, and inspect seals. Recheck the screws later.
If you are asking, “what are common problems with solar flood lights,” start by classifying the symptoms: weak illumination, short runtime, failure to charge, false sensor activation, or water intrusion. Use IEC 60529 IP ratings as a guide when checking enclosure protection, then test the solar panel under a reference condition of 1,000 W/m² at STC. Inspect the panel surface, wiring, connectors, and charging circuit for shading, dirt, corrosion, or loose connections.
Battery faults can often be identified by measuring individual cell voltage, typically within the 3.2–3.7 V range depending on the battery state and chemistry. Adjust the PIR sensor for its usual 8–12 m detection distance and approximately 120° coverage to reduce missed motion or false triggers. Finally, verify LED runtime and expected efficiency of around 100–150 lm/W. Before reinstalling the light, confirm secure mounting, correct wiring, weather sealing, and safe operation.

 Joliras Light